昨日の JAWS SONIC 2020 & MIDNIGHT JAWS 2020、Alexa周りのセッションだけ見てました。感想は別途まとめるとして、Alexa Champion伊東さんのセッションで紹介されていた「TalkyJS」を試してみたのでメモ。予めお伝えしておくと、JSもTSも全然詳しくないので深いことは書けません。その点は予めご了承ください。
目次
TalkyJSとは
Alexa Champion岡本さん謹製のrailsライクなフレームワークだそうです。サイトを見ると、以下のような特徴があります。
- ASK-SDK互換
- CLIからテンプレートを作成
- SSMLをJSX(TSX)で書ける
- 主要なハンドラやインターセプターをビルトイン
- シチュエーショナルデザインフレンドリー
サンプルコードを見るととてもスッキリ書けるようです。では早速試してみましょう。
cliのインストール
talkyjsのcliをインストールしておきます。
$ npm install -g @talkyjs/cli
プロジェクトの新規作成
なにはともあれ https://talkyjs.dev/docs/get-started/introduction に従ってやってみたいと思います。
HelloWorldなテンプレートが用意されているのでこれを使ってask newします。
$ ask new --template-url https://github.com/talkyjs/talkyjs-alexa-skill-template-helloworld.git
バックエンドはまずは "AWS Lambda"で。"Alexa-hosted"はそもそもask cliでテンプレートが使えないのでご注意。
? Choose a method to host your skill's backend resources: AWS Lambda
テンプレートが公式以外の場合は以下のような警告が出ます。"y"で進めます。
[Warn]: CLI is about to download the skill template from unofficial template https://github.com/talkyjs/talkyjs-alexa-skill-template-helloworld.git. Please make sure you understand the source code to best protect yourself from malicious usage.
? Would you like to continue download the skill template?  (y/N) y
スキル名はとりあえずデフォルトで。
? Please type in your skill name: (talkyjs-alexa-skill-template-helloworld)
プロジェクトのディレクトリ名もとりあえずデフォルトで。
? Please type in your folder name for the skill project (alphanumeric): (talkyjs-alexa-skill-template-helloworld)
以下のように表示されればOKです。
Project for skill "talkyjs-alexa-skill-template-helloworld" is successfully created at /...(snip).../talkyjs-alexa-skill-template-helloworld

Project initialized with deploy delegate "@ask-cli/cfn-deployer" successfully.
ディレクトリに移動してみましょう。
$ cd talkyjs-alexa-skill-template-helloworld
ディレクトリの構成はこんな感じです。
$ tree -a
.
├── .ask
│   └── ask-states.json
├── .github
│   └── PULL_REQUEST_TEMPLATE.md
├── .gitignore
├── LICENSE.txt
├── README.md
├── ask-resources.json
├── hooks
│   └── build.sh
├── infrastructure
│   └── cfn-deployer
│       └── skill-stack.yaml
├── lambda
│   ├── .npmignore
│   ├── README.md
│   ├── package.json
│   ├── src
│   │   ├── HelpIntent
│   │   │   ├── HelpIntent.router.ts
│   │   │   ├── HelpIntent.speech.tsx
│   │   │   └── tests
│   │   │       ├── HelpIntent.router.spec.ts
│   │   │       └── HelpIntent.speech.spec.tsx
│   │   ├── LaunchRequest
│   │   │   ├── LaunchRequest.router.ts
│   │   │   ├── LaunchRequest.speech.tsx
│   │   │   └── tests
│   │   │       ├── LaunchRequest.router.spec.ts
│   │   │       └── LaunchRequest.speech.spec.tsx
│   │   ├── StopAndCancelAndNoIntent
│   │   │   ├── StopAndCancelAndNoIntent.router.ts
│   │   │   ├── StopAndCancelAndNoIntent.speech.tsx
│   │   │   └── tests
│   │   │       ├── StopAndCancelAndNoIntent.router.spec.ts
│   │   │       └── StopAndCancelAndNoIntent.speech.spec.tsx
│   │   ├── index.ts
│   │   └── tests
│   │       └── index.spec.ts
│   ├── tsconfig.json
│   └── webpack.config.ts
└── skill-package
    ├── assets
    │   ├── en-US_largeIcon.png
    │   └── en-US_smallIcon.png
    ├── interactionModels
    │   └── custom
    │       └── en-US.json
    └── skill.json

18 directories, 31 files
中身はちょっと置いといて、一旦進めましょう。
デプロイ
lambdaディレクトリに移動して、パッケージをインストールしておきます。
この部分は本来はask deployの中でやってくれるみたいなのですが、私の環境ではask deploy時にビルドに必要なコマンド等へのパスが通っていない、等でコケたので、手動でインストールしてます。
$ cd lambda
$ npm install
ではデプロイします。プロジェクトのトップディレクトリに戻ってask deployします。
$ ask deploy

...snip...

Skill is enabled successfully.
enabled successfullyと表示されればOKです。これで、Alexa側にスキルが作成され、AWS側にLambdaの関数が作成されていればOKです。確認してみましょう。
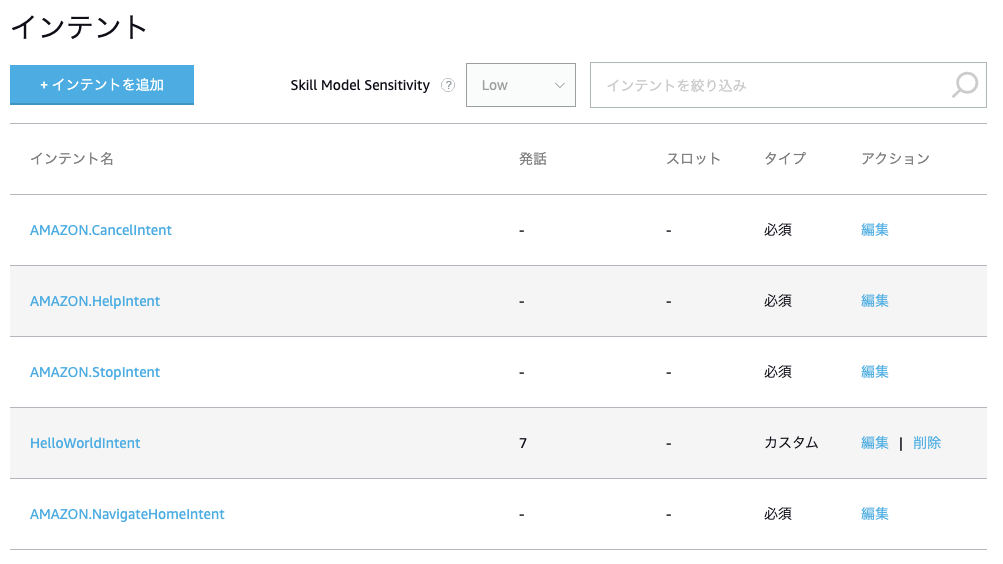
Alexa開発者コンソールにスキルが作成されています。

インテントもできていますね。ビルトインインテントとHelloWorldIntentがあるのが見えます。
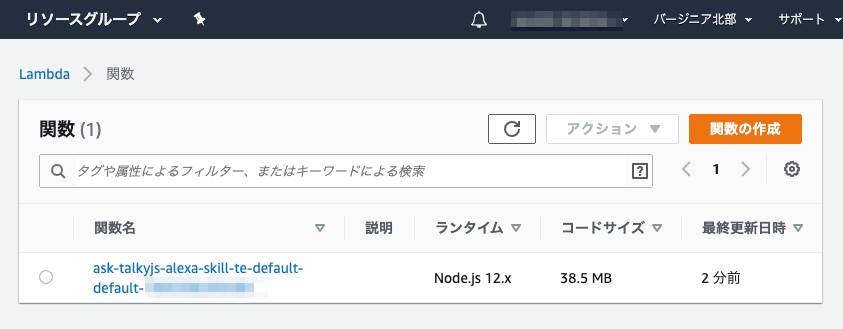
そしてLambdaの方にも作成されています。
実際に動かしてみましょう。Alexa開発者コンソールのテストシミュレータで"hello world"スキルを起動してみてください。
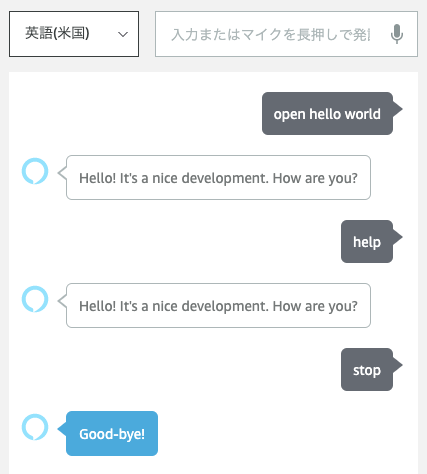
動いてますね!LaunchRequest/HelpIntent/StopIntentを実行してみました。HelloWorldIntentはこのあと追加しますのでまだありません。
routerの追加
routerとはなんぞや?ということなんですが、雑な説明をすると、よりシンプルに書けるリクエストハンドラーのようです。似たようなcanHandle/Handleみたいなのを毎回書くの、めんどくさいですよね。それをシンプルにしてくれます。
talkyjsでは、コマンドラインでrouterを追加することができます。lambdaディレクトリに移動して、以下を実行します。
$ talky g router HelloWorldIntent
対話形式で設定していきます。まずリクエストタイプ。"IntentRequest"を選択します。
? What type do you handle the request? (IntentRequest)
SSMLを何で書くか、を指定できます。通常のSSMLか、JSX(TSX)を選択できます。JSXというのは、Reactで採用されている、JS/TSのコードの中にHTML/XMLを埋め込んで書ける一種のテンプレート、といったもののようで(語弊があったらすみません)そういえば先日のAlexa Live 2020でAPLがJSXで書けるという話もありました。React全く知らないのですが、どういうものか見てみたいので、今回は "tsx" を選択します。
? Which type do you want to write SSML? (Use arrow keys)
  default
❯ tsx
以下のようにファイルの雛形が一通り生成されます。
CREATE src/HelloWorldIntent/HelloWorldIntent.router.ts (500 bytes)
CREATE src/HelloWorldIntent/HelloWorldIntent.speech.tsx (449 bytes)
CREATE src/HelloWorldIntent/tests/HelloWorldIntent.router.spec.ts (1242 bytes)
CREATE src/HelloWorldIntent/tests/HelloWorldIntent.speech.spec.tsx (518 bytes)
少しファイルの中身を覗いていく前に、普通にask-sdkで作った場合のハンドラーはこんな感じです。
const HelloWorldIntentHandler = {
    canHandle(handlerInput) {
        return Alexa.getRequestType(handlerInput.requestEnvelope) === 'IntentRequest'
            && Alexa.getIntentName(handlerInput.requestEnvelope) === 'HelloWorldIntent';
    },
    handle(handlerInput) {
        const speakOutput = 'Hello World!';

        return handlerInput.responseBuilder
            .speak(speakOutput)
            //.reprompt('add a reprompt if you want to keep the session open for the user to respond')
            .getResponse();
    }
};
talkyjsのrouterだとこんな感じになります。HelloWorldIntent.router.ts
import { Router } from "@talkyjs/core";

import { HelloWorldIntentScript } from './HelloWorldIntent.speech'


export const HelloWorldIntentRouter: Router = {
    requestType: "IntentRequest",
    intentName: "HelloWorldIntent",
    handler: async (handlerInput) => {


        const script = new HelloWorldIntentScript(handlerInput)
        return script
            .createResponseBuilder()
            .getResponse();


    }
}
canHandleのところがrequestTypeとintentNameだけで表現できるし、メインのロジックを書くhandleのところは今までとそれほど違うわけではありません。すっきりしていてわかりやすいし、以降もしやすそうです。
実際の発話部分はHelloWorldIntent.speech.tsxから読み込まれます。そちらを見てみましょう。
/** @jsx ssml */
import {
    ssml,
    SpeechScriptJSX,
} from '@ask-utils/speech-script'

export class HelloWorldIntentScript extends SpeechScriptJSX {
    speech() {
        return (
            <speak>
                <p>Hello! It's a nice development. How are you?</p>
            </speak>
        )
    }

    reprompt() {
        return (
            <speak>
                <p>How are you?</p>
            </speak>
        )
    }

}
色々書いてありますが、speech()とrepromptのreturnの中身のところです。ここSSMLをベタッと書けるようですね。なんていうかヒアドキュメントっぽい。これまでは普通に文字列として書くパターンが多いと思うのですが、クォートミスってコケるとかありがちですし、そもそもまず見にくい、ということで、スッキリ書けて見れるのはとても良いですね。値を渡して埋め込んだものを発話させるというのももちろんできるようです。
追加したルータ(ハンドラー)は、ask-sdkの場合と同じく、skillBuilderハンドラにリクエストハンドラとして追加する必要があります。ここもTalkyjsがラップしてくれていて、src/index.tsにこれまでと同じような形で追加するだけです。また、src/index.tsでは、永続アトリビュートに使用するデータベースの設定ができたり、development/productionなど環境によってデバッグ機能の有効・無効を制御できたりするようですが、今回は割愛します。
以下の2箇所に追加します。
import { SkillFactory, TalkyJSSkillConfig, SkillHandler } from '@talkyjs/core'
import { CustomSkillBuilder } from 'ask-sdk-core'
import { LaunchRequestRouter } from './LaunchRequest/LaunchRequest.router'
import { HelpIntentRouter } from './HelpIntent/HelpIntent.router'
import { StopAndCancelAndNoIntentRouter } from './StopAndCancelAndNoIntent/StopAndCancelAndNoIntent.router'
import { HelloWorldIntentRouter } from './HelloWorldIntent/HelloWorldIntent.router'           // ★追加

...snip...

/**
 * Skill Factory (Added preset handler)
 */
export const skillFactory = SkillFactory.launch(config)
.addRequestRouters([
    LaunchRequestRouter,
    HelpIntentRouter,
    StopAndCancelAndNoIntentRouter,
    HelloWorldIntentRouter,      // ★追加
])

...snip...
最後にちょっとおまけで、HelloWorldスキルっぽく全体的な発話を修正していきましょう。
src/HelloWorldIntent/HelloWorldIntent.speech.tsx
export class HelloWorldIntentScript extends SpeechScriptJSX {
    speech() {
        return (
            <speak>
                <p>Hello World. It's a nice development. You can say hello to me.</p>
            </speak>
        )
    }

    reprompt() {
        return (
            <speak>
                <p>Say hello to me.</p>
            </speak>
        )
    }

}
src/LaunchRequest/LaunchRequest.speech.tsx
/** @jsx ssml */
import {
    ssml,
    SpeechScriptJSX,
} from '@ask-utils/speech-script'

export class LaunchRequestScript extends SpeechScriptJSX {
    speech() {
        return (
            <speak>
                <p>Welcome to Hello World. you can say hello to me.</p>
            </speak>
        )
    }

    reprompt() {
        return (
            <speak>
                <p>Say hello to me.</p>
            </speak>
        )
    }

}
src/HelpIntent/HelpIntent.speech.tsx
/** @jsx ssml */
import {
    ssml,
    SpeechScriptJSX,
} from '@ask-utils/speech-script'

export class HelpIntentScript extends SpeechScriptJSX {
    speech() {
        return (
            <speak>
                <p>In this skill, when you say hello, I will say hello. Say hello to me.</p>
            </speak>
        )
    }

    reprompt() {
        return (
            <speak>
                <p>Say hello to me.</p>
            </speak>
        )
    }

}
では、再度デプロイします。
$ ask deploy
テストします。
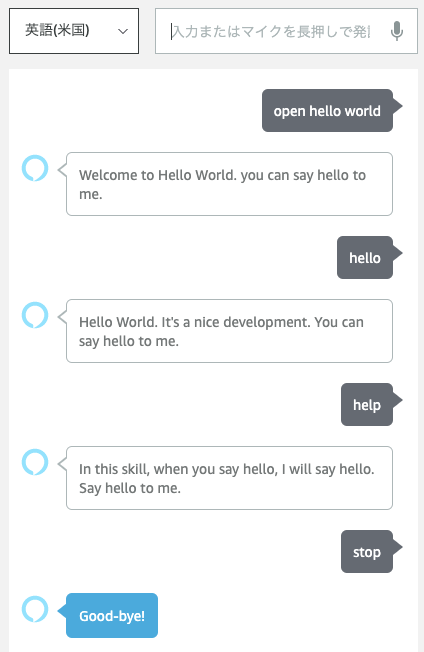
うまくいきました!
まとめ
まずはかんたんに動かしてみるところまでやってみました。まだ全然さわりの部分しか見えてないですが、シンプルに書けてCLIでサクッとハンドラ追加できたりして良さそうだなぁという印象です。ReactもTSも全然知らないレベルなので、以前作ったシンプルなスキルをお試しで移行しつつ、色々触ってみようかなと思ってます。とりあえず日本語のHelloWorldテンプレート作ろうかな〜。
他にもたくさん便利な機能があるようなので、詳細はドキュメントを御覧ください。