
今日はAWS亀田さんによるAmazon Lexのハンズオンに参加してきました。
Lexについては、ブログでも何度かまとめています。
なのでLexそのものについてはだいたい理解していたのですが(もちろんAlexaの知識もほぼそのまま使えますしね)、今回はそれだけでなく、LexをボットのバックエンドとしてLINEやTwilioなどをフロントエンドとして連携させるのはとても興味深いものでした。こちらについては、ハンズオン資料が公開されているので、興味がある方はぜひお試しください。
このようにいろいろなフロントエンドと組み合わせて使えるLexですが、ウェブサイトに埋め込んだりして使いたい、というニーズももちろんあると思います。そこでAWS AmplifyでWebアプリケーションを作ってLexとつなげてみよう、というのが今日のお題です。
目次
AWS Amplifyについて
はじめに、AWS Amplifyについてですが、以下あたりがわかりやすいのかなぁと思います。
ただこれ見ても正直わからないw。個人的にWebの開発経験がほとんどないのでイメージできないんですね。とりあえず調べながら触りながらやっていこうと思います。
前提条件
- Lexのボットは事前に作成済みの日本語ボットを使います。
BookTrip_jaJPを使いました。
Amplify CLIのインストール
では早速やっていきましょう。何はともあれAWS Amplifyを使うにはAmplify CLIが必要みたいなので、インストールします。
$ npm install -g @aws-amplify/cli
amplify -vを実行して、以下のように表示されればOKです。
$ amplify -v
Initializing new Amplify CLI version...
Done initializing new version.
Scanning for plugins...
Plugin scan successful
4.52.0
AWSアカウントの紐付けを行います。ブラウザが立ち上がってAWSへのログイン画面が出てきたらログインしてから、Enterします。
$ amplify configure

Follow these steps to set up access to your AWS account:

Sign in to your AWS administrator account:
https://console.aws.amazon.com/
Press Enter to continue
リージョンを選択します。通常ap-northeast-1かなと思います。
Specify the AWS Region
? region:  (Use arrow keys)
  us-east-1
  us-east-2
  us-west-2
  eu-west-1
  eu-west-2
  eu-central-1
❯ ap-northeast-1
ユーザ名を設定しますが、ランダムに設定されたものが用意されていますね。何も入力せずにこのままEnterします。
Specify the username of the new IAM user:
? user name:  (amplify-ziG6E)
ブラウザでIAMユーザの作成画面が表示され、ユーザ名やアクセスの種類などが設定されていますね(これちょっとすごい)。「次のステップ:アクセス権限」をクリックします。
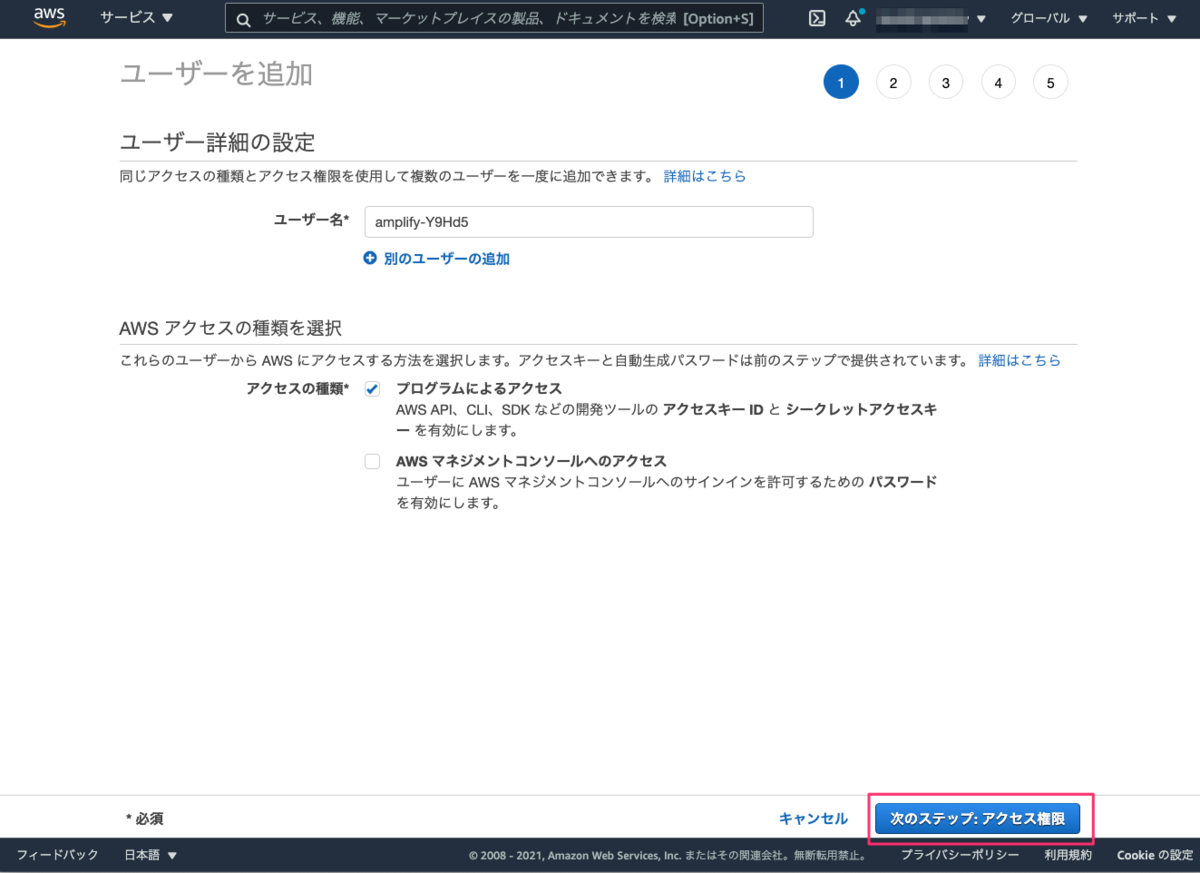
標準だとAdministratorAcessでフルアクセスできる状態になっています。テストならこれでもいいんですが、できればもうちょっと絞りたい。

そこでAmplify公式のドキュメントにIAMポリシーの設定例があります。
ただ、実はこれでもいくつか足りなくてAmplifyコマンドの実行時に怒られました。足りないものを追加した最終的なポリシーは以下になりました。
{
    "Version": "2012-10-17",
    "Statement": [
        {
            "Sid": "VisualEditor0",
            "Effect": "Allow",
            "Action": [
                "amplify:CreateApp",
                "amplify:CreateBackendEnvironment",
                "amplify:CreateBranch",
                "amplify:CreateDeployment",
                "amplify:DeleteApp",
                "amplify:DeleteBackendEnvironment",
                "amplify:DeleteBranch",
                "amplify:GetApp",
                "amplify:GetBackendEnvironment",
                "amplify:GetJob",
                "amplify:ListApps",
                "amplify:ListJobs",
                "amplify:ListBackendEnvironments",
                "amplify:ListBranches",
                "amplify:ListDomainAssociations",
                "amplify:UpdateApp",
                "amplify:StartDeployment",
                "amplify:StopJob",
                "apigateway:DELETE",
                "apigateway:GET",
                "apigateway:PATCH",
                "apigateway:POST",
                "apigateway:PUT",
                "appsync:CreateApiKey",
                "appsync:CreateDataSource",
                "appsync:CreateFunction",
                "appsync:CreateGraphqlApi",
                "appsync:CreateResolver",
                "appsync:CreateType",
                "appsync:DeleteApiKey",
                "appsync:DeleteDataSource",
                "appsync:DeleteFunction",
                "appsync:DeleteGraphqlApi",
                "appsync:DeleteResolver",
                "appsync:DeleteType",
                "appsync:GetDataSource",
                "appsync:GetFunction",
                "appsync:GetGraphqlApi",
                "appsync:GetIntrospectionSchema",
                "appsync:GetResolver",
                "appsync:GetSchemaCreationStatus",
                "appsync:GetType",
                "appsync:GraphQL",
                "appsync:ListApiKeys",
                "appsync:ListDataSources",
                "appsync:ListFunctions",
                "appsync:ListGraphqlApis",
                "appsync:ListResolvers",
                "appsync:ListResolversByFunction",
                "appsync:ListTagsForResource",
                "appsync:ListTypes",
                "appsync:StartSchemaCreation",
                "appsync:TagResource",
                "appsync:UpdateApiKey",
                "appsync:UpdateDataSource",
                "appsync:UpdateFunction",
                "appsync:UpdateGraphqlApi",
                "appsync:UpdateResolver",
                "appsync:UpdateType",
                "cloudformation:CreateChangeSet",
                "cloudformation:CreateStack",
                "cloudformation:CreateStackSet",
                "cloudformation:DeleteStack",
                "cloudformation:DeleteStackSet",
                "cloudformation:DescribeChangeSet",
                "cloudformation:DescribeStackEvents",
                "cloudformation:DescribeStackResource",
                "cloudformation:DescribeStackResources",
                "cloudformation:DescribeStacks",
                "cloudformation:DescribeStackSet",
                "cloudformation:DescribeStackSetOperation",
                "cloudformation:ExecuteChangeSet",
                "cloudformation:GetTemplate",
                "cloudformation:UpdateStack",
                "cloudformation:UpdateStackSet",
                "cloudfront:CreateCloudFrontOriginAccessIdentity",
                "cloudfront:CreateDistribution",
                "cloudfront:DeleteCloudFrontOriginAccessIdentity",
                "cloudfront:DeleteDistribution",
                "cloudfront:GetCloudFrontOriginAccessIdentity",
                "cloudfront:GetCloudFrontOriginAccessIdentityConfig",
                "cloudfront:GetDistribution",
                "cloudfront:GetDistributionConfig",
                "cloudfront:TagResource",
                "cloudfront:UntagResource",
                "cloudfront:UpdateCloudFrontOriginAccessIdentity",
                "cloudfront:UpdateDistribution",
                "cognito-identity:CreateIdentityPool",
                "cognito-identity:DeleteIdentityPool",
                "cognito-identity:DescribeIdentity",
                "cognito-identity:DescribeIdentityPool",
                "cognito-identity:GetIdentityPoolRoles",
                "cognito-identity:SetIdentityPoolRoles",
                "cognito-identity:TagResource",
                "cognito-identity:UpdateIdentityPool",
                "cognito-idp:AdminAddUserToGroup",
                "cognito-idp:AdminCreateUser",
                "cognito-idp:CreateGroup",
                "cognito-idp:CreateUserPool",
                "cognito-idp:CreateUserPoolClient",
                "cognito-idp:DeleteGroup",
                "cognito-idp:DeleteUser",
                "cognito-idp:DeleteUserPool",
                "cognito-idp:DeleteUserPoolClient",
                "cognito-idp:DescribeUserPool",
                "cognito-idp:DescribeUserPoolClient",
                "cognito-idp:ListTagsForResource",
                "cognito-idp:ListUserPoolClients",
                "cognito-idp:UpdateGroup",
                "cognito-idp:UpdateUserPool",
                "cognito-idp:UpdateUserPoolClient",
                "dynamodb:CreateTable",
                "dynamodb:DeleteItem",
                "dynamodb:DeleteTable",
                "dynamodb:DescribeContinuousBackups",
                "dynamodb:DescribeTable",
                "dynamodb:DescribeTimeToLive",
                "dynamodb:ListStreams",
                "dynamodb:ListTables",
                "dynamodb:PutItem",
                "dynamodb:TagResource",
                "dynamodb:UpdateContinuousBackups",
                "dynamodb:UpdateItem",
                "dynamodb:UpdateTable",
                "dynamodb:UpdateTimeToLive",
                "es:AddTags",
                "es:CreateElasticsearchDomain",
                "es:DeleteElasticsearchDomain",
                "es:DescribeElasticsearchDomain",
                "events:DeleteRule",
                "events:DescribeRule",
                "events:ListRuleNamesByTarget",
                "events:PutRule",
                "events:PutTargets",
                "events:RemoveTargets",
                "iam:AttachRolePolicy",
                "iam:CreatePolicy",
                "iam:CreatePolicyVersion",
                "iam:CreateRole",
                "iam:DeletePolicy",
                "iam:DeletePolicyVersion",
                "iam:DeleteRole",
                "iam:DeleteRolePolicy",
                "iam:DetachRolePolicy",
                "iam:GetPolicy",
                "iam:GetRole",
                "iam:GetRolePolicy",
                "iam:GetUser",
                "iam:ListAttachedRolePolicies",
                "iam:ListPolicyVersions",
                "iam:PassRole",
                "iam:PutRolePolicy",
                "iam:UpdateRole",
                "kinesis:AddTagsToStream",
                "kinesis:CreateStream",
                "kinesis:DeleteStream",
                "kinesis:DescribeStream",
                "kinesis:PutRecords",
                "lambda:AddLayerVersionPermission",
                "lambda:AddPermission",
                "lambda:CreateEventSourceMapping",
                "lambda:CreateFunction",
                "lambda:DeleteEventSourceMapping",
                "lambda:DeleteFunction",
                "lambda:DeleteLayerVersion",
                "lambda:GetEventSourceMapping",
                "lambda:GetFunction",
                "lambda:GetFunctionConfiguration",
                "lambda:GetLayerVersion",
                "lambda:GetLayerVersionByArn",
                "lambda:InvokeAsync",
                "lambda:InvokeFunction",
                "lambda:ListEventSourceMappings",
                "lambda:ListLayerVersions",
                "lambda:PublishLayerVersion",
                "lambda:RemoveLayerVersionPermission",
                "lambda:RemovePermission",
                "lambda:UpdateFunctionCode",
                "lambda:UpdateFunctionConfiguration",
                "lex:GetBot",
                "lex:GetBuiltinIntent",
                "lex:GetBuiltinIntents",
                "lex:GetBuiltinSlotTypes",
                "logs:DescribeLogStreams",
                "logs:GetLogEvents",
                "mobiletargeting:GetApp",
                "rekognition:DescribeCollection",
                "s3:CreateBucket",
                "s3:DeleteBucket",
                "s3:DeleteBucketPolicy",
                "s3:DeleteBucketWebsite",
                "s3:DeleteObject",
                "s3:DeleteObjectVersion",
                "s3:GetBucketLocation",
                "s3:GetObject",
                "s3:ListAllMyBuckets",
                "s3:ListBucket",
                "s3:ListBucketVersions",
                "s3:PutBucketAcl",
                "s3:PutBucketCORS",
                "s3:PutBucketNotification",
                "s3:PutBucketPolicy",
                "s3:PutBucketWebsite",
                "s3:PutEncryptionConfiguration",
                "s3:PutObject",
                "s3:PutObjectAcl"
            ],
            "Resource": "*"
        }
    ]
}
使わなそうなものや見直しが必要なものもありますが一旦はこれで行きましょう。「ポリシーの作成」をクリックします。

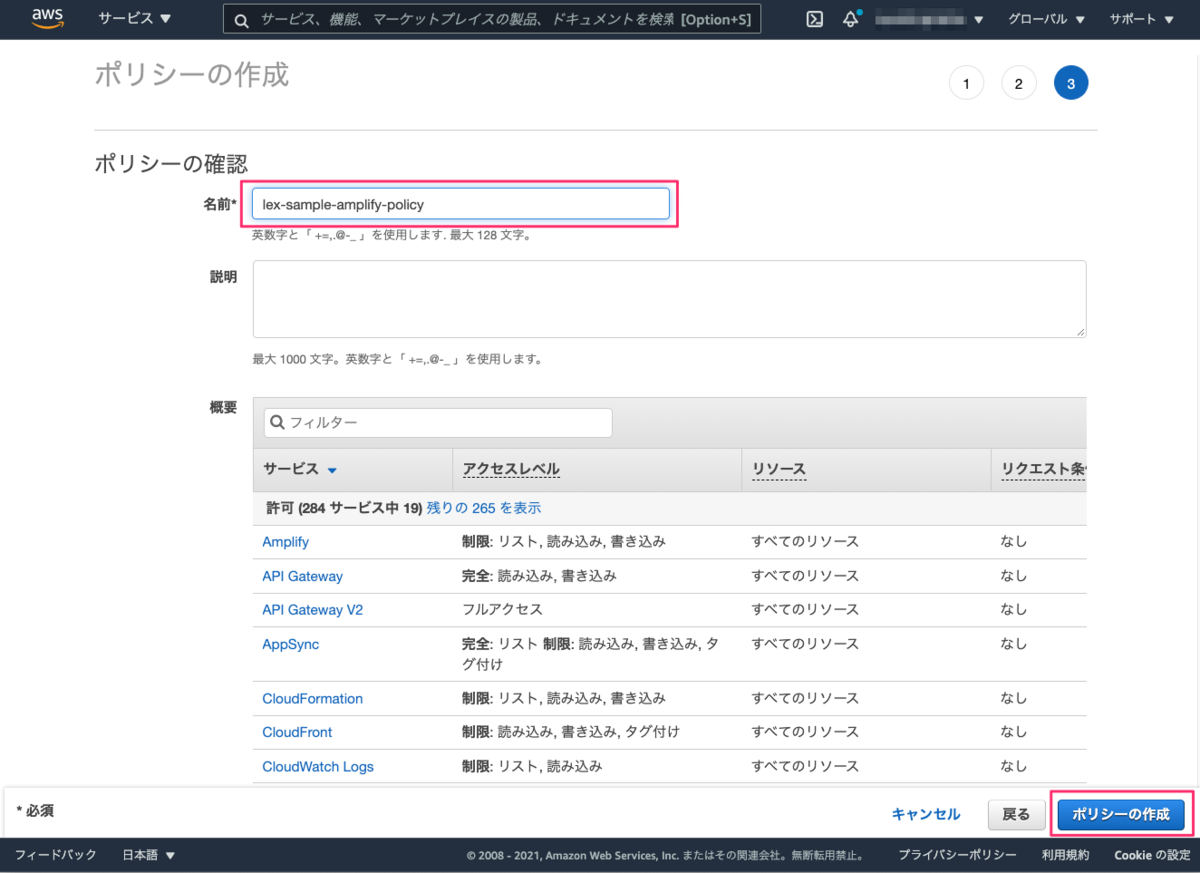
別タブでポリシー作成画面が開きます。JSONタブをクリックして、上記のJSONでまるっと上書きします。いくつか警告が出ていますが、一旦気にしないものとします。「次のステップ:タグ」をクリックして進みます。

タグは特に設定する必要はないです。「次のステップ:確認」をクリック。

適当なポリシー名をつけます。今回はlex-sample-amplify-policyとしました。「ポリシーの作成」をクリックします。
ポリシーが作成されました。このタブはもう閉じてOKです。元のタブに戻りましょう。

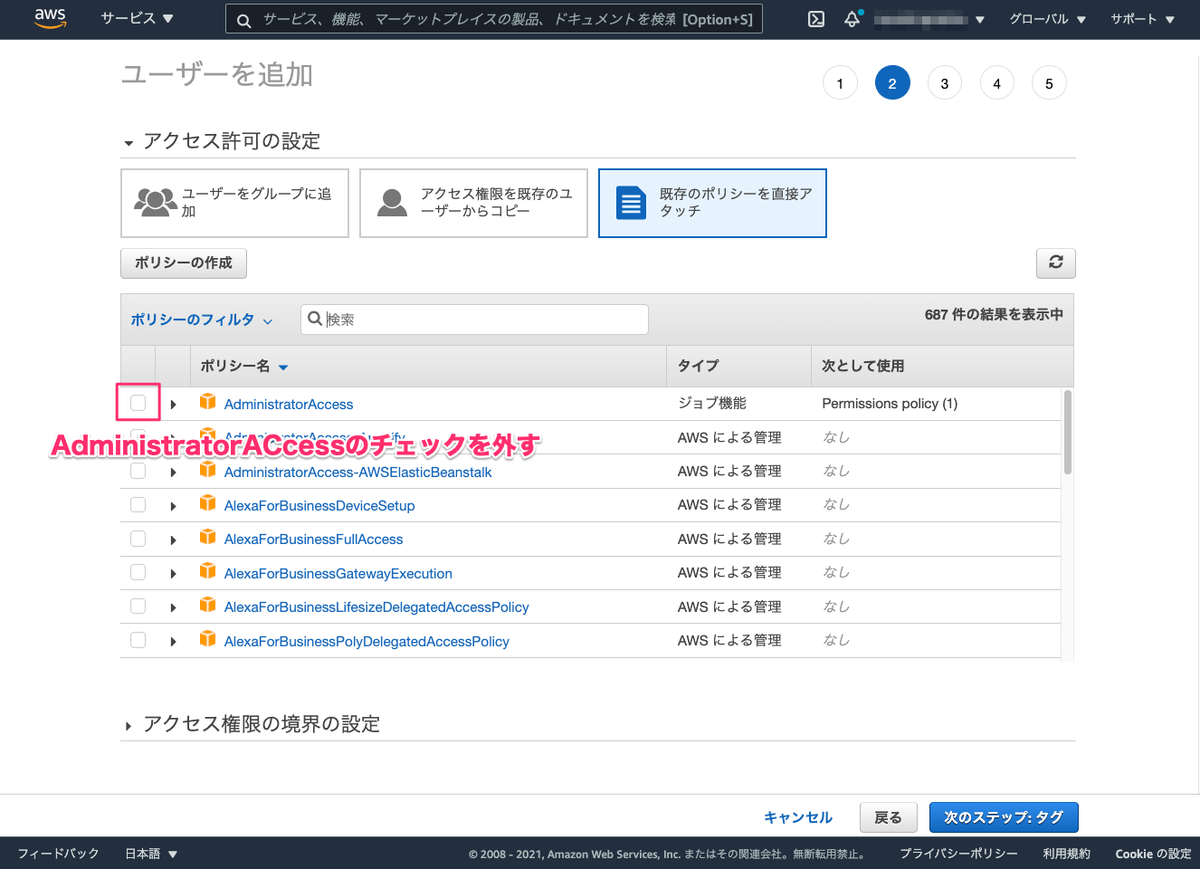
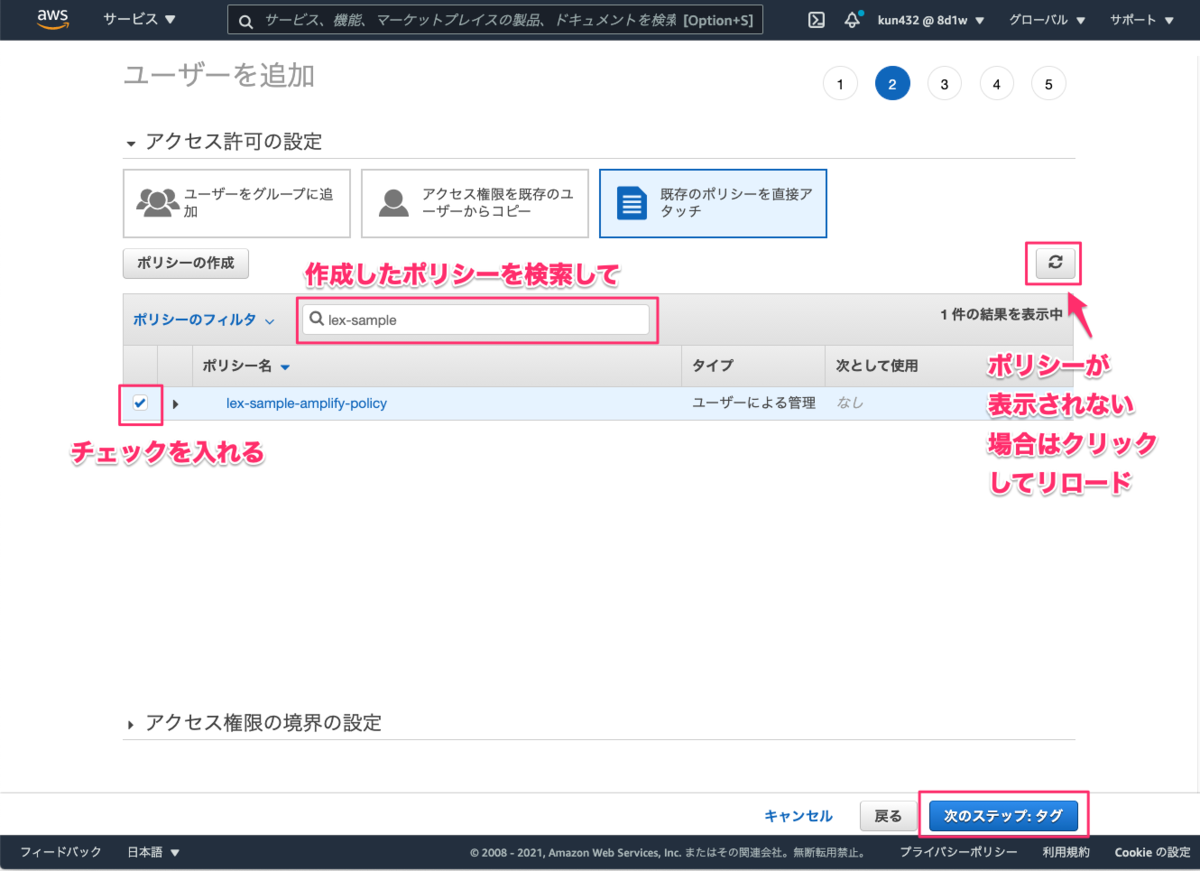
IAMユーザ作成の続きです。AdministratorAccessのチェックを外して、先ほど作成したポリシーを選択して、「次のステップ:タグ」をクリックします。
タグは特に設定しません。「次のステップ:確認」をクリックします。

確認画面が表示されるので、権限が正しく設定されていることを確認して
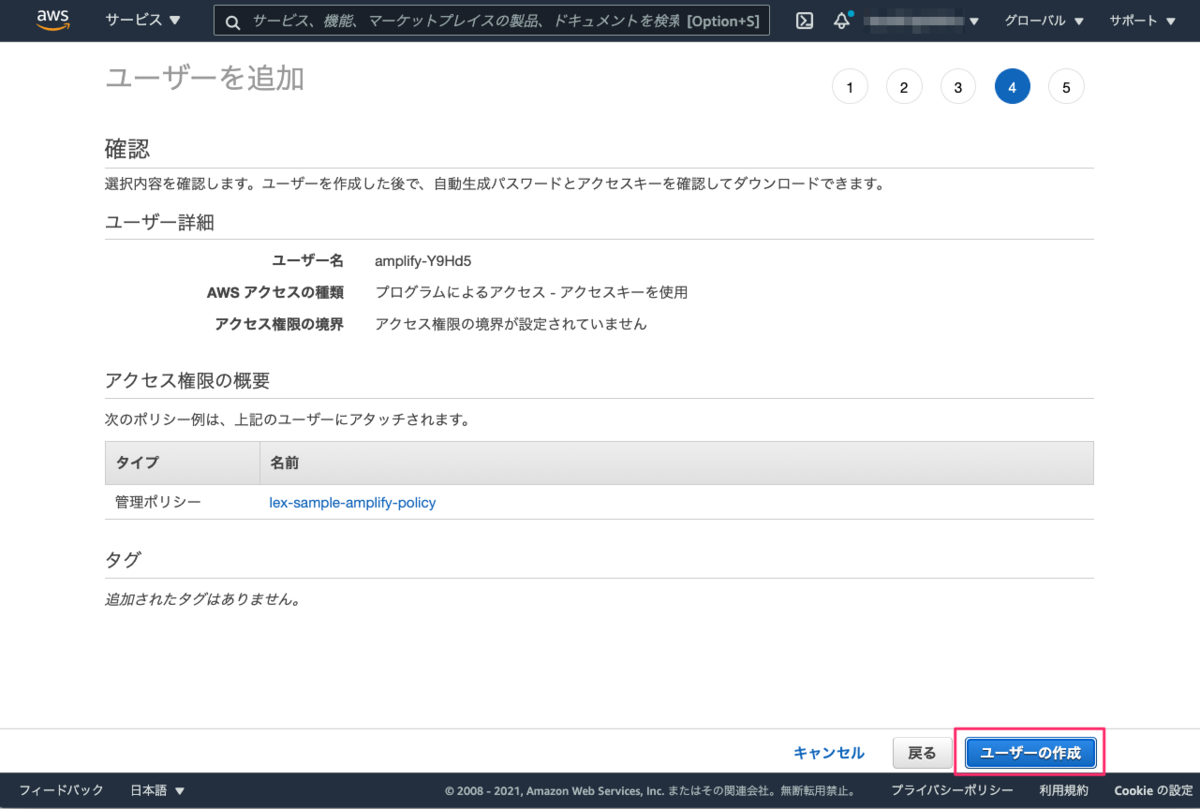
ユーザが作成されるとアクセスキー・シークレットアクセスキーが表示されます。
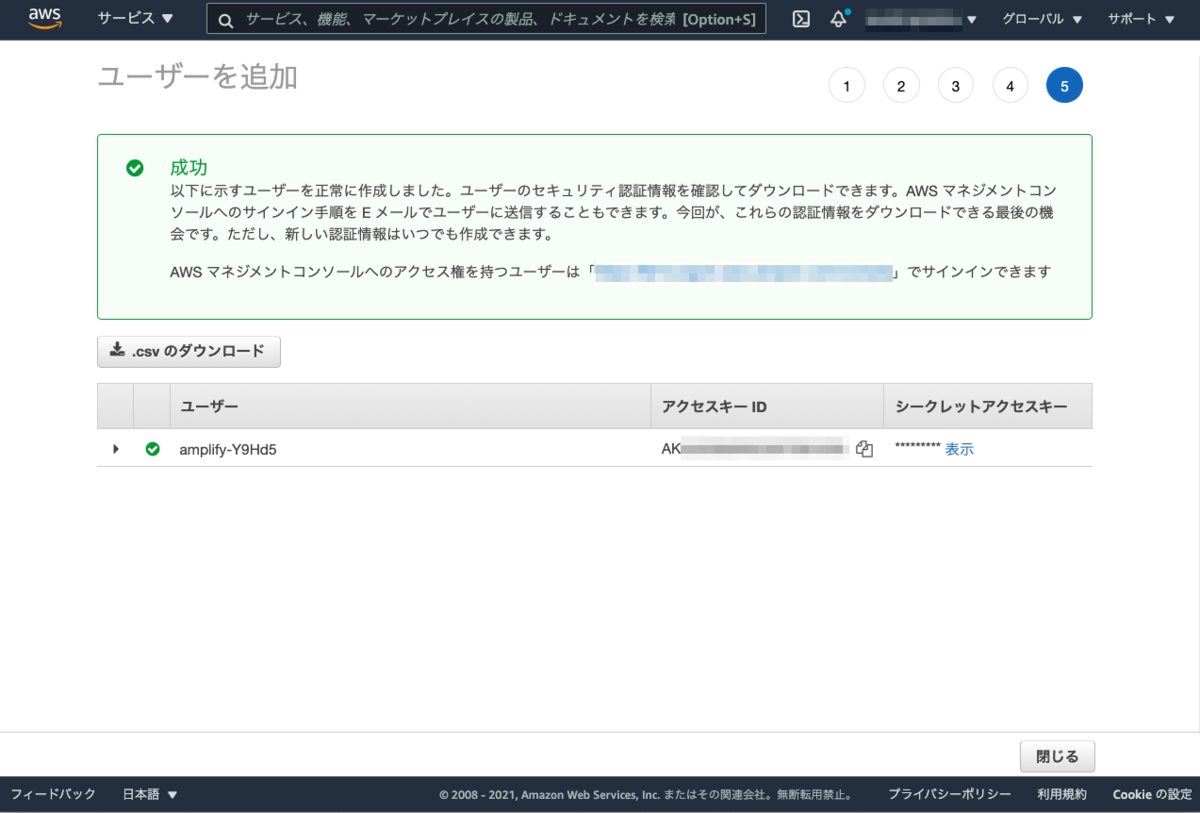
ターミナルに戻ってEnterをクリックすると進みます。先ほど表示されていたアクセスキー、シークレットアクセスキーをコピペで入力します。
Enter the access key of the newly created user:
? accessKeyId:  ********************
? secretAccessKey:  ********************
認証プロファイルが作成されます。デフォルトだとdefaultというプロファイル名になりますが、すでに該当のプロファイル名がある場合は更新されますので、適当なプロファイル名にします。
This would update/create the AWS Profile in your local machine
? Profile Name:  amplify-lex
以下のように表示されればOKです。
Successfully set up the new user.
アプリケーションの作成
vue-cliのインストール
ではアプリケーションを作成していきます。アプリケーションはVue.jsで作成していきます。vue-cliをインストールします。
$ npm install -g @vue/cli
プロジェクトを作成します。
$ vue create lex-bot-sample
初回だけデフォルトのnpmレジストリの設定があるようです。とりあえずYで。
?  Your connection to the default npm registry seems to be slow.
   Use https://registry.npm.taobao.org for faster installation? (Y/n) Y
プロジェクトのバージョンを指定します。せっかくなので新しいものを使いましょう。Vue3で。
Vue CLI v4.5.13
? Please pick a preset:
  Default ([Vue 2] babel, eslint)
❯ Default (Vue 3) ([Vue 3] babel, eslint)
  Manually select features
パッケージマネージャが複数ある場合は選択ができます。お好みの方を。今回はnpmで。
? Pick the package manager to use when installing dependencies:
  Use Yarn
❯ Use NPM
以下のように表示されればOKです。アプリケーションの起動方法が記載されていますね。
🎉  Successfully created project lex-bot-sample.
👉  Get started with the following commands:

 $ cd lex-bot-sample
 $ npm run serve
では立ち上げてみます。
 $ cd lex-bot-sample
 $ npm run serve
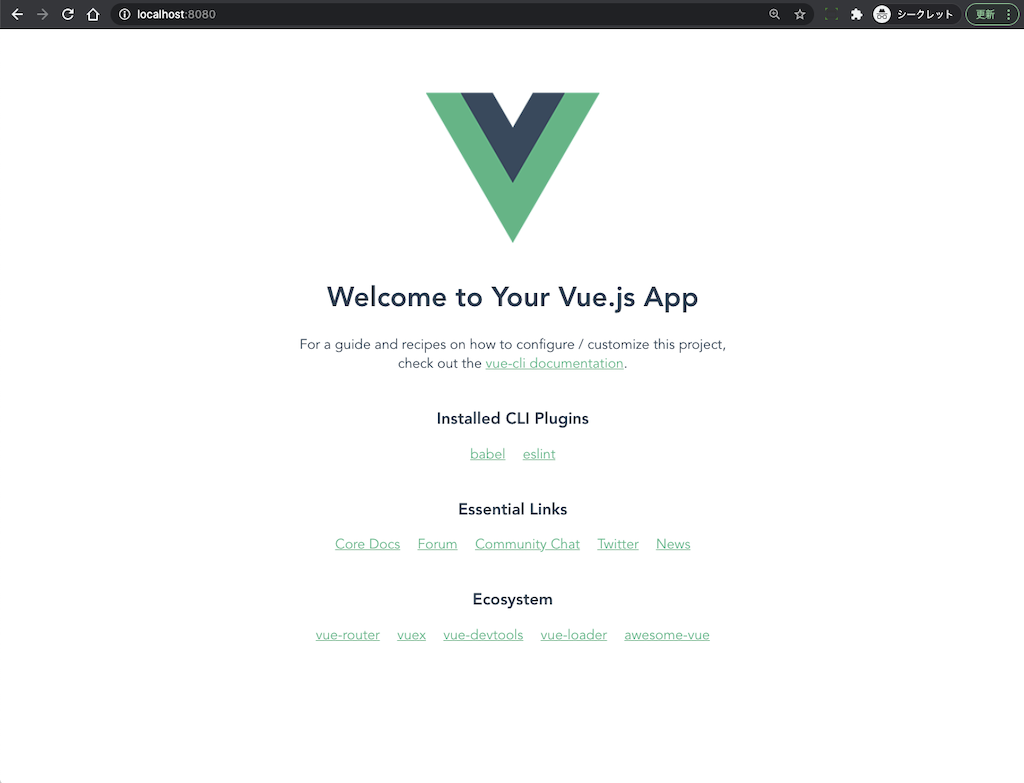
URLが表示されていますね。ブラウザでアクセスしてみましょう。
 DONE  Compiled successfully in 2148ms                              19:01:44


  App running at:
  - Local:   http://localhost:8080/
  - Network: http://192.168.86.179:8080/

  Note that the development build is not optimized.
  To create a production build, run npm run build.
起動していますね。
ターミナルに戻って、一旦ctrl+cで止めておきます。
アプリケーションへのAmplifyの組み込み
作成したVueプロジェクトにAmplifyを組み込んでいきます。まずAmplifyの初期化。先ほど作成したVueアプリケーションのルートディレクトリにいることを確認してamplify initを実行します。
$ amplify init
アプリケーションのルートディレクトリにいると、プロジェクト名のデフォルトは自動的に判別されるみたいですね。とりあえず、このままEnter。
Note: It is recommended to run this command from the root of your app directory
? Enter a name for the project (lexbotsample)
デフォルトでいろんな設定が行われます。とりあえずこのままで良いでしょう。Yで進めます。
The following configuration will be applied:

Project information
| Name: lexbotsample
| Environment: dev
| Default editor: Visual Studio Code
| App type: javascript
| Javascript framework: vue
| Source Directory Path: src
| Distribution Directory Path: dist
| Build Command: npm run-script build
| Start Command: npm run-script serve

? Initialize the project with the above configuration? (Y/n) Y
CloudFormationでAWSリソースが作成されるようです。
Using default provider awscloudformation
Amplify CLIからAWSにアクセスする場合の認証を設定します。最初にIAMユーザ及びプロファイルを作成しましたので、そのプロファイルを使いましょう。AWS profileを選択。
? Select the authentication method you want to use: (Use arrow keys)
❯ AWS profile
  AWS access keys
先ほど作成したプロファイル名を選択します。
? Please choose the profile you want to use (Use arrow keys)
  default
❯ amplify-lex
CloudFormationでリソースが作成され、以下のように表示されればOKです。
Adding backend environment dev to AWS Amplify Console app: XXXXXXXXXXXX
⠋ Initializing project in the cloud...

CREATE_IN_PROGRESS amplify-lexbotsample-dev-214102 AWS::CloudFormation::Stack Sat Jun 05 2021 21:41:09 GMT+0900 (GMT+09:00) User Initiated
CREATE_IN_PROGRESS DeploymentBucket                AWS::S3::Bucket            Sat Jun 05 2021 21:41:13 GMT+0900 (GMT+09:00)
CREATE_IN_PROGRESS AuthRole                        AWS::IAM::Role             Sat Jun 05 2021 21:41:13 GMT+0900 (GMT+09:00)
CREATE_IN_PROGRESS UnauthRole                      AWS::IAM::Role             Sat Jun 05 2021 21:41:13 GMT+0900 (GMT+09:00)
(snip)
CREATE_COMPLETE amplify-lexbotsample-dev-XXXXXX AWS::CloudFormation::Stack Sat Jun 05 2021 21:41:39 GMT+0900 (GMT+09:00)
✔ Successfully created initial AWS cloud resources for deployments.
✔ Initialized provider successfully.
Initialized your environment successfully.

Your project has been successfully initialized and connected to the cloud!

Some next steps:
"amplify status" will show you what you've added already and if it's locally configured or deployed
"amplify add <category>" will allow you to add features like user login or a backend API
"amplify push" will build all your local backend resources and provision it in the cloud
"amplify console" to open the Amplify Console and view your project status
"amplify publish" will build all your local backend and frontend resources (if you have hosting category added) and provision it in the cloud

Pro tip:
Try "amplify add api" to create a backend API and then "amplify publish" to deploy everything
Lexボットとの連携
では、ここからアプリケーションにLexボットと連携できるように機能を追加していきます。本来であれば、amplify interactions addを実行すると、
- 簡単な質問だけでLexボットが作成される
- Cognitoによる認証も自動的に作成される(Lexボットとセットになっているようです)
- 上記を利用するようにアプリケーションが設定される
みたいなのですが、
amplify interactions addで作成されるのは英語のボットで、日本語のボットを追加することができない(作成後にボット側を修正すればいいのかもしれません)- すでに存在するボットをコマンドで設定することができない(様子)
ということなので少しひねる必要があります。ここは以下を参考にしました。
まずCognitoの認証機能を追加します。今回作成するWebチャットボットに認証は特に不要なのですが、ここはどうやら必須のようです。
$ amplify add auth
認証方式について聞かれますが、デフォルトにしておきます。
Using service: Cognito, provided by: awscloudformation

 The current configured provider is Amazon Cognito.

 Do you want to use the default authentication and security configuration? (Use arrow keys)
❯ Default configuration
  Default configuration with Social Provider (Federation)
  Manual configuration
  I want to learn more.
認証時のIDはUsernameにしておきます。
 Warning: you will not be able to edit these selections.
 How do you want users to be able to sign in? (Use arrow keys)
❯ Username
  Email
  Phone Number
  Email or Phone Number
  I want to learn more.
詳細な設定を行うか、聞かれますが、Noにします。
 Do you want to configure advanced settings? (Use arrow keys)
❯ No, I am done.
  Yes, I want to make some additional changes.
以下のように表示されればOKです。
Successfully added auth resource lexbotsample697d6996 locally

Some next steps:
"amplify push" will build all your local backend resources and provision it in the cloud
"amplify publish" will build all your local backend and frontend resources (if you have hosting category added) and provision it in the cloud
ではamplify pushしてバックエンドのリソースを作成します。
$ amplify push
✔ Successfully pulled backend environment dev from the cloud.

Current Environment: dev

| Category | Resource name        | Operation | Provider plugin   |
| -------- | -------------------- | --------- | ----------------- |
| Auth     | lexbotsample697d6996 | Create    | awscloudformation |
? Are you sure you want to continue? Yes

⠏ Updating resources in the cloud. This may take a few minutes...

UPDATE_IN_PROGRESS amplify-lexbotsample-dev-14556 AWS::CloudFormation::Stack Sun Jun 06 2021 02:14:19 GMT+0900 (GMT+09:00) User Initiated
(snip)
✔ All resources are updated in the cloud
これでCognitoの認証が作成されましたが、このままだとアプリケーションにアクセスする場合に必ず認証が必要になってしまいます。Webサイトに埋め込んだりして公開する場合には認証は不要なので、Cognito側の設定を変更します。
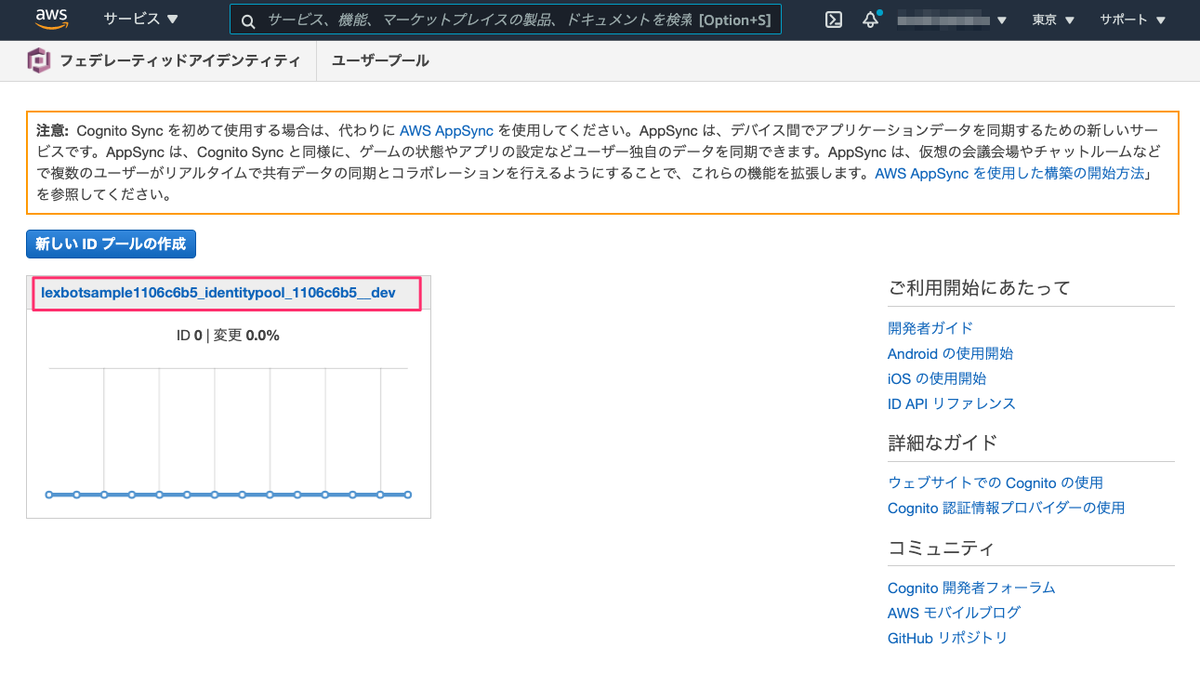
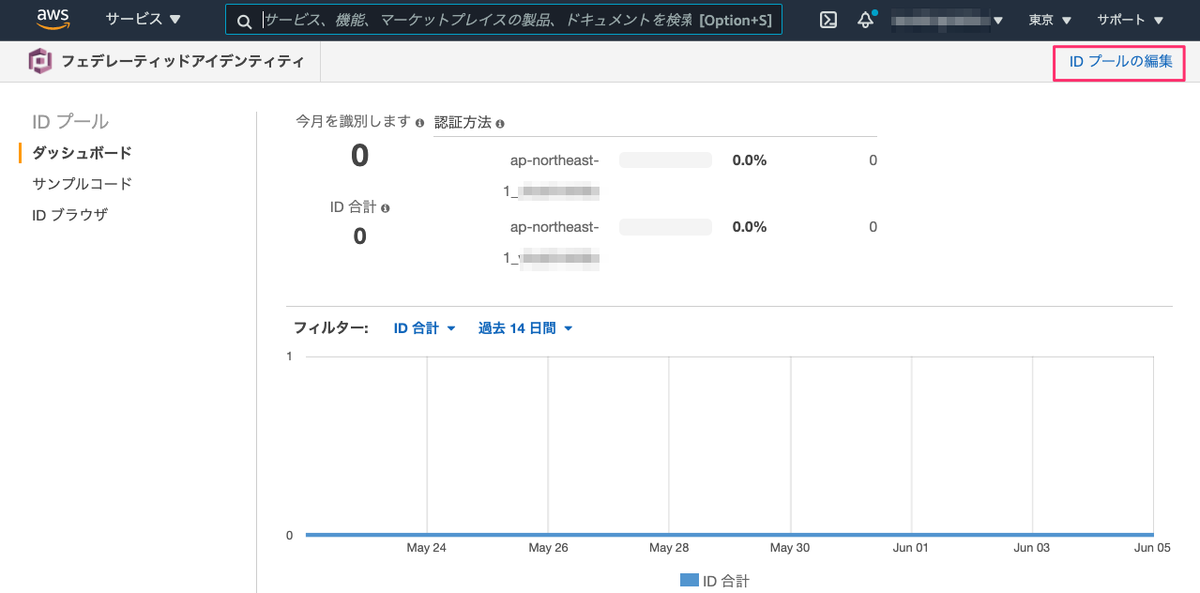
マネジメントコンソールからCognitoの画面を開いて「IDプールの管理」をクリックします。

Amplifyのプロジェクト名がついているIDプールをクリックします。
右上の「IDプールの編集」をクリックします。
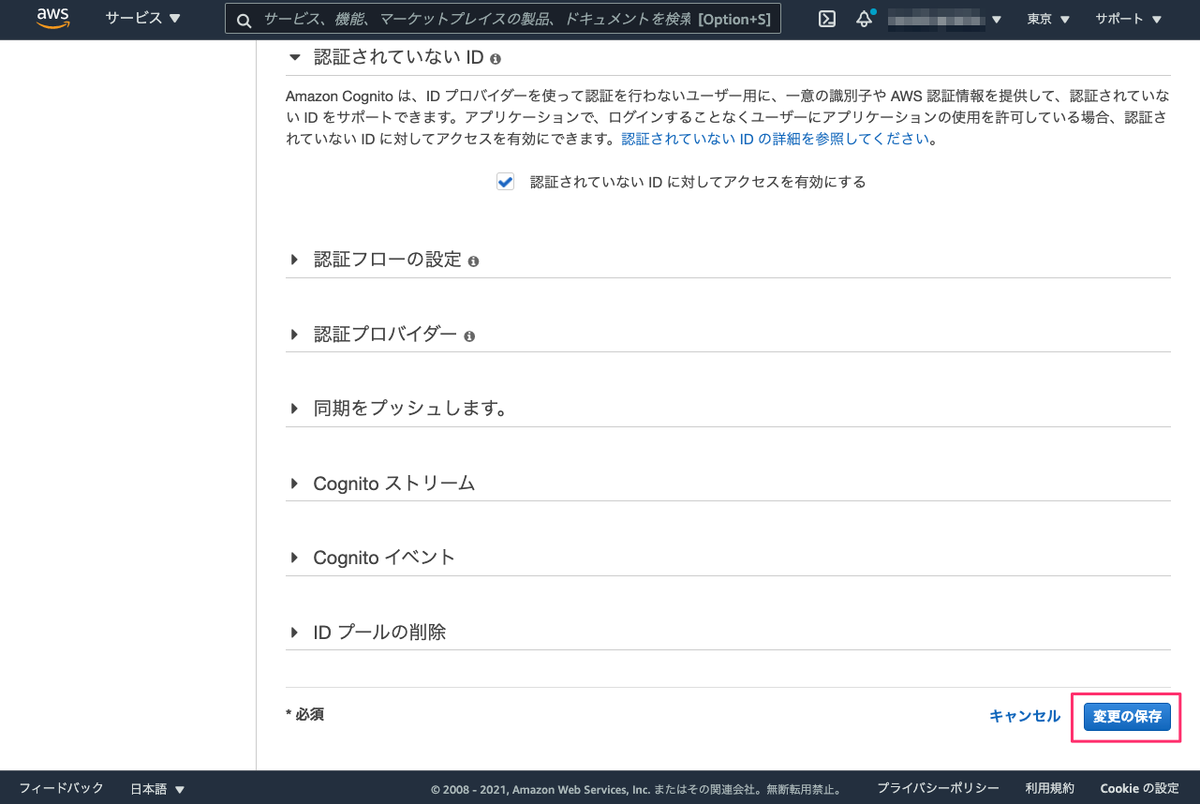
「認証されていないID」をクリックすると、「認証されていないIDに対してアクセスを有効にする」のチェックボックスが表示されますのでチェックを入れて、一番下にある「変更の保存」をクリックします。また、上に表示されている「認証されていないロール」に対して、アクセス権限を付与しますので、ロール名をメモしておきます。Amplifyで作成した場合、ロール名は一定のルールで作成されている(amplify-プロジェクト名-ステージ(devとかprod)-ランダムな数字-unauthRoleといった感じ)ようです。

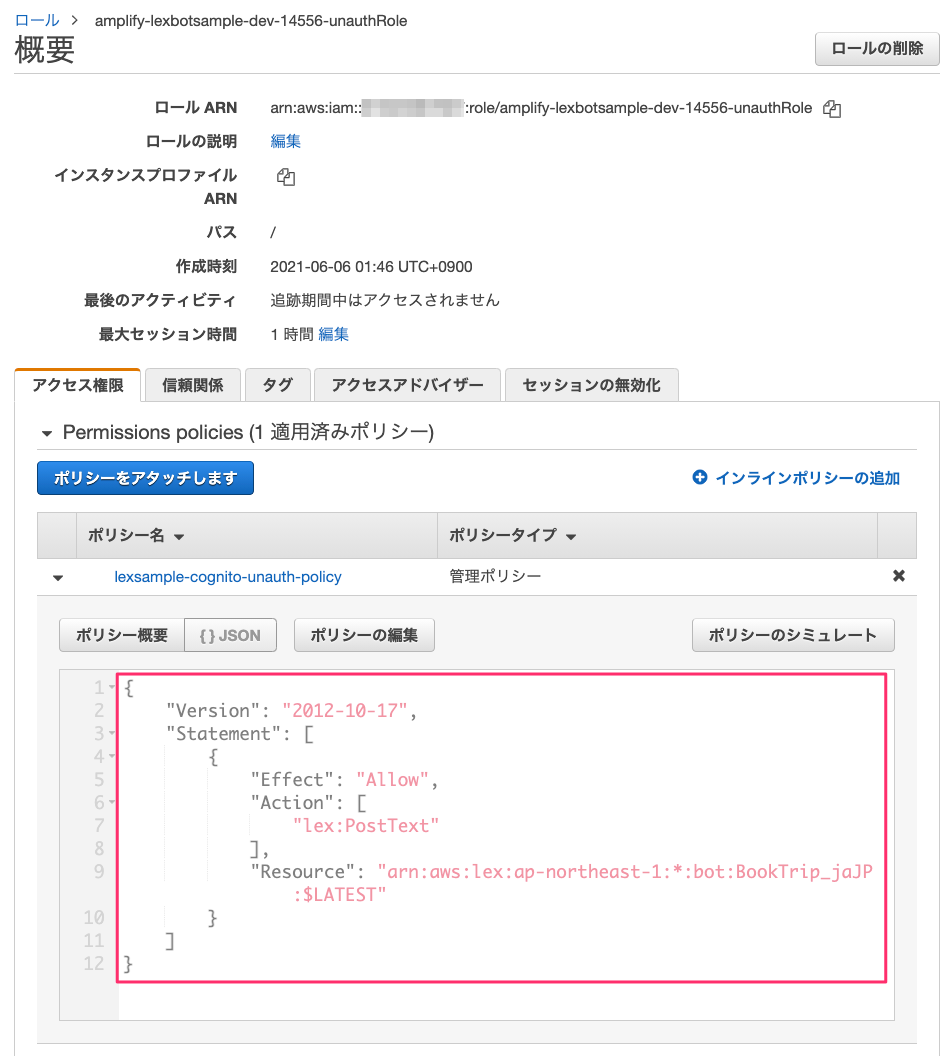
IAMロールの画面を開いて、先程のロールに対して、Lexボットへの書き込みを許可するポリシーを追加しておきます。これで認証がなくてもアクセスできるようになります。
ではコードを修正していきましょう。コードの修正はこちらを参考にしました。
余談ですが、上のサイトでは "amplify interactions add"でLexボットを作成していますね。ボットを作成してから日本語化するのは面倒どうやらできない様子なので、最初から日本語のボットを作らせてほしいなぁと思います。
最初にAmplifyのライブラリを追加します。
$ npm install aws-amplify @aws-amplify/ui-components
src/main.jsを開いて、以下の部分を追加します。
import { createApp } from 'vue'
import App from './App.vue'

//ここから
import Amplify from 'aws-amplify';
import awsconfig from './aws-exports';
import {
  applyPolyfills,
  defineCustomElements,
} from '@aws-amplify/ui-components/loader';

applyPolyfills().then(() => {
  defineCustomElements(window);
});
Amplify.configure(awsconfig);
const botconfig = {
  bots: {
      "BookTrip_jaJP": {
        "alias": "$LATEST",
        "region": "ap-northeast-1",
      }
  }
}
Amplify.configure(botconfig)
//ここまで

createApp(App).mount('#app')
Amplify.configure(botconfig)の箇所は、本来ならamplify interactions addでLexボットを追加した場合にはsrc/aws-exports.js内に設定されるのでそちらに書くべきです。が、今回のように、Amplifyの管理外でLexボットを作成していると、Lexボットが存在することをAmplifyは認識できないためコマンド実行時に変更されてしまう(消えてしまう)ということで、こちらに記載しているようです。なるほど・・・
次にsrc/App.vueを開いて、こちらは以下でまるっと上書きします。
<template>
    <amplify-chatbot
        bot-title="Chatbot Lex"
        bot-name="BookTrip_jaJP"
        welcome-message="ホテルとレンタカーの予約ができますよ。どうしますか?"
        voice-enabled="{true}"
    >
        <!-- eslint-disable-next-line vue/no-deprecated-slot-attribute -->
        <div slot="header" className="custom-header">
            <img
                src="https://raw.githubusercontent.com/aws-amplify/amplify-js/main/vscode/images/logo.png"
                height="40"
            />
            Amplify Chatbot
        </div>
    </amplify-chatbot>
</template>

<script>
const handleChatComplete = (event) => {
    const { data, err } = event.detail;
    if (data) alert('success!\n' + JSON.stringify(data));
    if (err) alert(err);
};
export default {
    name: 'App',
    components: {},
    mounted() {
        this.$el.addEventListener('chatCompleted', handleChatComplete);
    },
    beforeUnmount() {
        this.$el.removeEventListener('chatCompleted', handleChatComplete);
    },
};
</script>

<style>
:root {
  --amplify-primary-color: #fd8abd;
}

amplify-chatbot {
  --width: 450px;
  --height: 600px;
  --header-color: rgb(40, 40, 40);
  --bot-background-color: #eaebff;
  --bot-text-color: rgb(40, 40, 40);
  --user-background-color: #fd8abd;
}

.custom-header {
  padding: 1.25rem 0.375rem 1.25rem 0.375rem;
  text-align: center;
  font-size: 1.6rem;
}
</style>
ローカルで実行してみましょう。
$ npm run serve

  App running at:
  - Local:   http://localhost:8080/
  - Network: http://192.168.86.179:8080/

  Note that the development build is not optimized.
  To create a production build, run npm run build.
ブラウザでアクセスして、LexボットとのやりとりができればOKです。

アプリケーションの公開
では作成したアプリケーションを公開します。最初にamplify hosting addでホスティングの設定を行います。
$ amplify hosting add
いくつか聞かれますが、デフォルトで進めます。
? Select the plugin module to execute (Use arrow keys)
❯ Hosting with Amplify Console (Managed hosting with custom domains, Continuous de
ployment)
  Amazon CloudFront and S3
? Choose a type (Use arrow keys)
  Continuous deployment (Git-based deployments)
❯ Manual deployment
  Learn more
以下のように表示されればホスティングの設定はOKです。
You can now publish your app using the following command:

Command: amplify publish
最後にamplify publishで公開です。
$ amplify publish
確認が表示されたらY。
✔ Successfully pulled backend environment dev from the cloud.

Current Environment: dev

| Category | Resource name        | Operation | Provider plugin   |
| -------- | -------------------- | --------- | ----------------- |
| Hosting  | amplifyhosting       | Create    | awscloudformation |
| Auth     | lexbotsample1106c6b5 | No Change | awscloudformation |
? Are you sure you want to continue? (Y/n)  Y
作成したアプリケーションがビルドされ、Amplifyコンソール上にデプロイされます。以下のようにURLが表示されればデプロイ完了です。
✔ Zipping artifacts completed.
✔ Deployment complete!
https://dev.xxxxxxxxx.amplifyapp.com
URLにアクセスして、ローカルで実行したときと同じようにアプリケーションが動作すればOKです!
アプリケーションの削除
Amplifyで作成したアプリケーションおよびリソースはamplify deleteですべて削除されるようです。
 $ amplify delete
? Are you sure you want to continue? This CANNOT be undone. (This will delete all
the environments of the project from the cloud and wipe out all the local files cr
eated by Amplify CLI) (y/N) y
⠋ Deleting resources from the cloud. This may take a few minutes...
Deleting env:dev
✔ Project deleted in the cloud
Project deleted locally.
まとめ
Amplifyイマイチわかってなかったのですが、アプリケーションに必要なAWSリソースをかんたんに管理・追加して公開できる、というプラットフォーム的なサービスという感じですね。日本語のLexボットを使いたいので少し異なるやり方になっていますが、AmplifyだけでLexボットまでマルっと作成できると確かに便利そうですし、またチャットのUIも予め用意されているので、ほんとに少ないコードでかんたんに動くところまで持っていけるのはすごいなと思います。
あと、個人的に感じたのは、Amplifyでのアプリケーション開発は、CLIで全てのリソースを管理・完結させるという考え方なのかなというところですね。すでに既存のアプリケーションや開発環境などがある場合にどういうふうに棲み分けるか?みたいなのはちょっと考えるところもあるのかなとか勝手に推測してます。まだよくわかってないので、もう少し触ってみたいかな。
LexというよりはAmplifyのほうがメインになっちゃいましたが、Lexで作ったボットをいろんなフロントエンドで提供するというのはマルチモーダルな感じでとてもよい、というのが今日の結論です。